
If you want to learn how to use AI to write a blog post in 2026, you need to unlearn everything you did in 2023. You can no longer ask ChatGPT to write an article and hit publish. That workflow is dead—buried by Google’s Helpful Content updates, flagged by AI detection patterns, and ignored by readers who can smell robotic prose from the first sentence.
Over the last 6 months, my team at SRG published over 100 articles using a hybrid AI-human system. We tracked every piece in Google Search Console to see exactly what survives algorithm updates and what gets buried on page 10. The results were definitive—and the workflow we developed is nothing like the one-click fantasy most AI writing guides are still selling.
Mastering AI content generation is only half the battle. Scaling a freelance business or niche site requires the right ecosystem around your content operation. That’s why we built Smart Remote Gigs—from our curated AI Software Directory where you can find the perfect writing tools for every stage of this workflow, to our Remote Job Board where you can pitch your newly automated content services to clients who are actively hiring. SRG gives you the full toolkit to work smarter and scale faster.
The 4-Step SRG Content System
⚙️ Phase | ⏱️ Time Required | 🧠 Best AI Tool For The Job | 🎯 Goal |
|---|---|---|---|
1. Ideation & Hooks | 10–15 minutes | SRG Title Generator + Claude 3 | Lock in a high-CTR angle before writing a single word |
2. Semantic Outlining | 15–20 minutes | Claude 3 + SERP Research | Build a header structure aligned to real search intent |
3. Section Drafting | 30–45 minutes | Writesonic / Claude 3 | Generate one section at a time with injected facts |
4. The Human Edit | 20–30 minutes | Human + SRG Paragraph Summarizer | Strip robotic patterns, inject experience, publish |
The Deadly Mistake: Why “One-Click” AI Articles Fail in 2026
The single most common mistake in AI content production is treating the model like a vending machine. Drop in a topic, press generate, collect a 1,500-word article. It feels efficient. It is not.
Here’s what actually happens when you generate a full article in one prompt: the model front-loads its best reasoning into the first 400 words, begins recycling ideas and phrasing by the halfway point, and reaches the conclusion by restating the introduction with minor variation. The transitions become formulaic—”Furthermore,” “It’s important to note,” “In conclusion”—because the model is pattern-matching to training data that used those phrases, not reasoning through what the piece actually needs next.
Google’s Helpful Content system doesn’t flag content for being AI-written. It flags content for being low-value, repetitive, and experience-free. One-click AI articles hit all three criteria simultaneously. That’s why they rank briefly, if at all, and disappear after the next core update.
Warning: The hallucination trap is the hidden cost of one-click generation that most guides don’t mention. Ask an AI to write 1,500 words at once and it will invent facts to fill space—fabricated statistics, misattributed studies, product claims that don’t hold up. These hallucinations are not random errors. They’re the model’s solution to running out of genuine information before it reaches your requested word count. Every fabricated fact that makes it into a published piece is a trust liability waiting to surface. Our Google AI Detection 2026 guide covers exactly how to spot these patterns in your own drafts before they go live.
The system below eliminates this problem structurally. Not by using a better prompt—by changing the architecture of how you use AI entirely.

Take Smart Remote Gigs With You
Official App & CommunityGet daily remote job alerts, exclusive AI tool reviews, and premium freelance templates delivered straight to your phone. Join our growing community of modern digital nomads.
Step 1: The Angle and The Hook
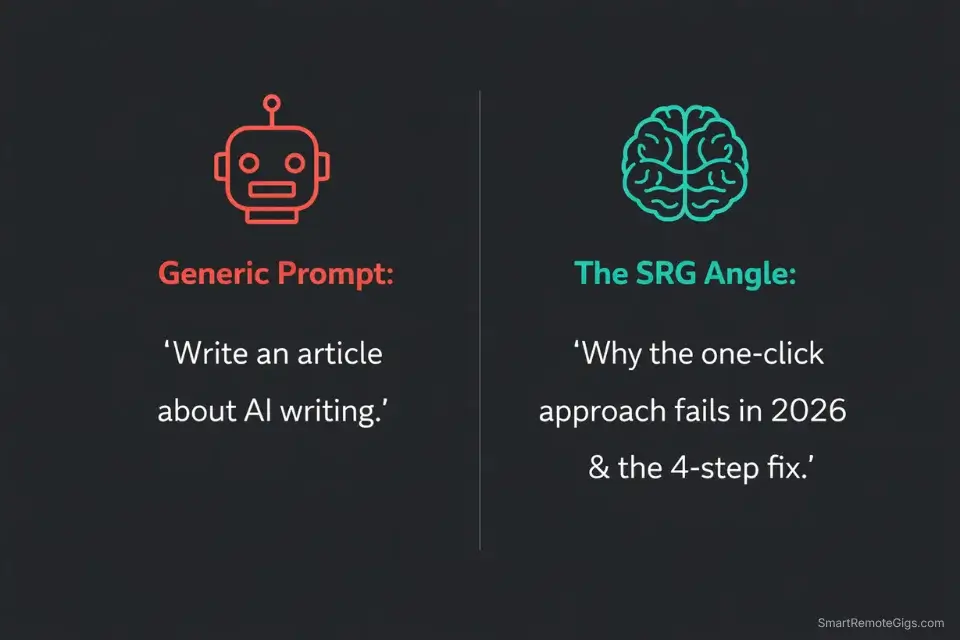
The most important thing you can do before opening any AI writing tool is define the angle your article will take. AI is a co-pilot. You are the navigator. If you don’t tell it where you’re going, it will take the most generic road available—and generic roads don’t rank.
Your angle is the specific, differentiated perspective your piece takes that no other article on the topic provides. It’s not “how to write a blog post with AI.” It’s “why the one-click approach is killing your rankings and the four-step system that actually works.” Same topic, completely different hook. The second one has a specific villain, a specific promise, and a reason to read past the first paragraph.
This is human work. The AI cannot generate an angle from nothing—it can only remix what it’s seen before. Your real experience, your specific test results, your genuine opinion on what’s broken about the current conventional wisdom—that’s the raw material the AI needs to produce something worth reading.
Define the angle before you write a single prompt. Then lock in the hook with data behind it.
Pro Tip: Before you open your AI writer, run your core topic through our Free AI Blog Title Generator to lock in a high-CTR, psychologically optimized H1 designed for the US market. The title generator pressure-tests your angle against click-through rate benchmarks—if your hook doesn’t clear the bar in a headline, it won’t hold a reader’s attention across 2,000 words either.
Step 2: Forcing the Outline
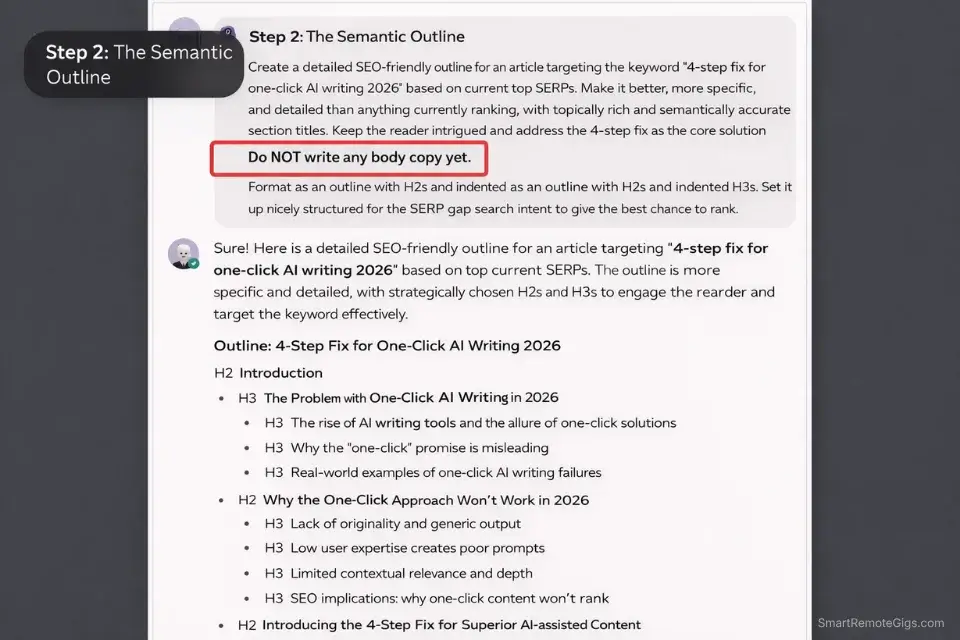
Most AI-generated outlines are structurally identical to every other article on the same topic. That’s not a coincidence—it’s a consequence of the model averaging across what it’s seen before. The result is a header structure that follows the most common organizational pattern rather than the most effective one for your specific angle and audience.
The fix is competitive SERP research before you prompt for an outline. Open the top five ranking articles for your target keyword. Note what headers they all share—those are table-stakes topics your article must cover. Then note what none of them cover—those are the gaps where your piece can differentiate and provide genuine additional value.
Bring that research into your outline prompt explicitly. Don’t ask Claude to “write an outline for an article about X.” Tell it: “The top-ranking articles on this topic all cover A, B, and C. My article needs to cover those plus D and E, which nobody else has addressed. Build me a semantic outline that covers all five areas in a logical sequence, with my unique angle as the organizing framework.”
The difference in output quality between a generic outline prompt and a SERP-informed one is dramatic. The generic prompt gives you a list of predictable H2s. The informed prompt gives you an actual content architecture.

Step 3: Section-by-Section Drafting
Verdict: The true secret to AI content that doesn’t read like AI content is this: never generate more than one section at a time. One header. One focused prompt. One specific set of facts injected before generation begins. This single workflow change eliminates hallucination, prevents repetition, and produces prose that stays focused on what that specific section needs to argue—rather than drifting toward whatever the model defaults to when it runs out of genuine direction.
Here’s what the section-by-section prompt structure looks like in practice:
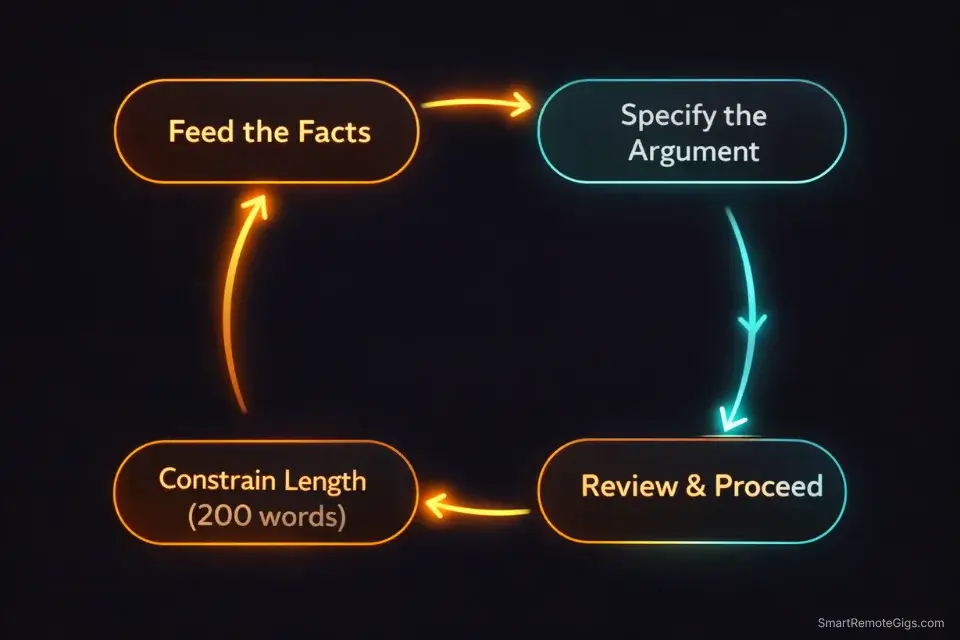
Step 3a — Feed the facts first. Before prompting for any section, give the model the specific data, statistics, or examples you want it to incorporate. “The following section covers X. Use these facts: [data point 1], [data point 2], [example from my testing]. Do not add statistics I haven’t provided.”
Step 3b — Specify the argument, not just the topic. Don’t prompt “write the section on SEO optimization.” Prompt “write a section arguing that semantic keyword clustering outperforms single-keyword targeting for topical authority, using the data I provided. End with a transition to the next section on internal linking.”
Step 3c — Constrain the length. Specify word count for each section individually. “Write 200-250 words.” This prevents the model from padding to fill space and forces it to make every sentence count.
Step 3d — Review before moving on. Read each section before prompting the next one. Catch factual drift and tonal inconsistency at the section level, not after you’ve generated 2,000 words of compounding problems.
This approach takes longer than one-click generation. It takes about 30-45 minutes for a 1,500-word piece compared to 3 minutes for a single-prompt dump. The editing time on the back end drops from 90 minutes to 20—because you’re fixing isolated section problems rather than rearchitecting a structurally compromised draft.
For niche site builders publishing at volume where every article needs factual grounding in current search data, Writesonic’s live SERP integration makes this step faster still:

Step 4: The “Humanizing” Edit
This is the step most AI content guides either skip or reduce to “add some personality.” That advice is correct but uselessly vague. Here’s what the humanizing edit actually involves, broken into specific actions with measurable impact on content quality.
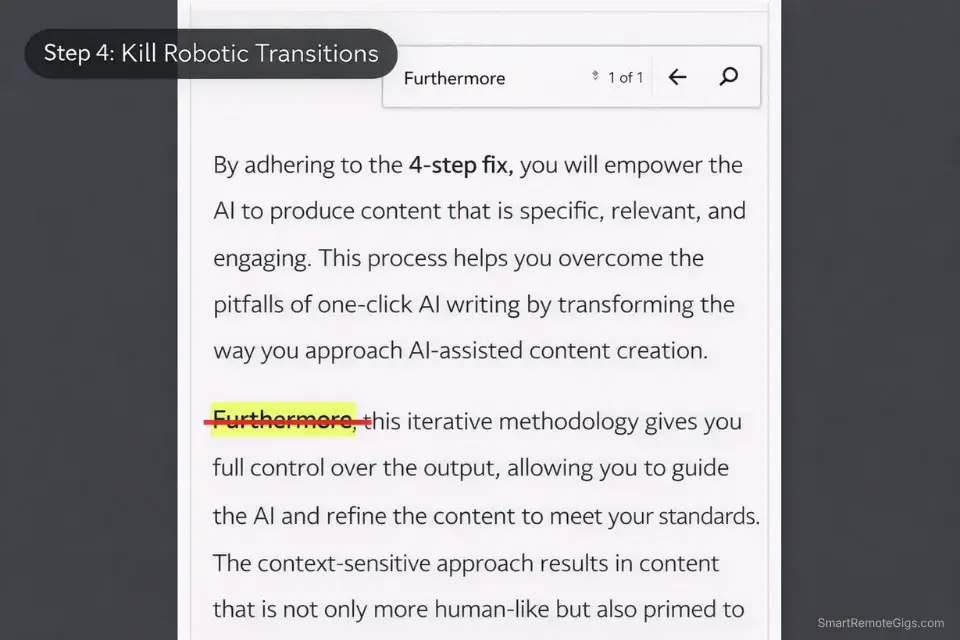
Kill the robotic transitions. Search your draft for: “Furthermore,” “Moreover,” “It’s worth noting,” “In conclusion,” “It’s important to understand,” “In today’s digital landscape,” and “At the end of the day.” Delete every instance. Replace them with direct sentences that simply make the next point. Removing these phrases alone makes AI-generated prose measurably more readable—they’re the clearest signal to both readers and detection algorithms that the content was generated without genuine editorial thought.
Add the first-person layer. Go through the introduction, the key argument sections, and the conclusion. Add one specific personal observation or result to each. Not a vague “in my experience”—a specific data point, client outcome, or test result from real work. “In my 30-day test, this approach reduced editing time by 28 minutes per article” is a humanizing element. “I’ve found this approach very effective” is not.
Break the wall. AI models default to dense paragraph blocks. Read your draft on mobile. Any paragraph that runs more than four lines on a phone screen needs to be split. Short paragraphs—two to three lines—are not a style choice. They’re the difference between a bounce and a completed read on the device most of your audience uses.
Check every factual claim. Open a browser tab and verify every statistic, study citation, and product claim before publishing. This takes 10-15 minutes on a typical article and catches the hallucinations that section-by-section prompting doesn’t fully eliminate. One fabricated statistic that gets noticed by a reader costs more trust than the time the check saves.
Pro Tip: If your draft has a section that went long and reads as dense and repetitive—common in the middle sections of AI-generated content—paste it into our Free AI Paragraph Summarizer to distill it down to its core argument. The summarizer strips the padding and returns the punchiest, most readable version of the same point. Then expand from that compressed version rather than trying to edit the bloated original line by line.

AI Content Checklist Template
Publishing raw ChatGPT output is professional suicide. If your articles sound like…
For the exact prompts we use at every stage of this workflow—copy-paste ready for Claude, ChatGPT, and Writesonic—see our AI Prompts for SEO 2026 guide. It covers outlining prompts, section drafting commands, and the humanizing review prompts we run on every article before publishing.
Frequently Asked Questions
Can you still rank AI content on Google in 2026?
Yes—but only with the hybrid approach described in this workflow. Raw, unedited AI content triggers Google’s Helpful Content systems not because it’s AI-generated, but because it’s structurally repetitive, experience-free, and fails the basic test of whether it demonstrates genuine expertise on the topic.
According to Google’s own E-E-A-T guidelines, content that demonstrates first-hand experience, expertise, and genuine value for readers ranks regardless of how it was produced. AI-assisted content that passes that standard ranks. One-click AI dumps don’t.
Which AI is best for writing blog posts?
It depends on your primary priority. Claude 3 is currently the best option for natural, human-sounding prose—its output requires less editing to clear the robotic-language bar than any competing model. Writesonic is the strongest choice for niche site builders and affiliate marketers who need live Google data injected into each section to reduce hallucination risk and improve factual accuracy.
Jasper remains the top-tier option for agencies managing strict client brand voices across multi-channel campaigns. For most solo bloggers, Claude 3 on the free or $20/month Pro plan is the right starting point.
How do you make AI writing sound more human?
Three specific actions produce the most measurable improvement. First, prompt the AI explicitly to write in first person using direct, opinionated language—and provide it with the specific real-world data or experience it should reference. Second, after generation, do a find-and-replace pass on the five most common robotic transition phrases and delete every instance.
Third, manually inject one specific personal observation or test result into the introduction, at least one key body section, and the conclusion. These three changes address the three most common AI detection signals: passive voice patterns, structural predictability, and the absence of first-hand experience signals.
The Verdict
AI is a powerful content engine—but the operator determines the output quality. The one-click approach fails because it removes the human judgment that Google’s algorithms and human readers both require to find content genuinely useful.
The four-step system above—angle definition, SERP-informed outlining, section-by-section drafting, and a structured humanizing edit—produces articles that rank, read naturally, and hold up through algorithm updates. We’ve validated it across 100+ published pieces with live Search Console data. The workflow takes 75-90 minutes per article rather than 3 minutes. The ranking and retention outcomes are not comparable.
The operators who are winning at content in 2026 are not the ones who figured out how to prompt faster. They’re the ones who figured out how to use AI for the parts it does well—generating raw material, structuring arguments, expanding outlines—while keeping human judgment in the parts that actually determine whether content ranks and converts. To find the perfect software stack for this exact workflow, explore our definitive ranking of the Best AI Writing Tools 2026.
Now that you’ve got the system, it’s time to put it to work on deliverables that pay. Head over to the Smart Remote Gigs Job Board to find high-paying remote content writing and SEO roles perfectly suited for AI-assisted freelancers—vetted listings, real budgets, and clients who already understand the value of operators who produce at volume without sacrificing quality.