
If you’ve ever reached the end of your workday wondering where all the time went—despite being “busy” the entire time—you’re not alone. The problem isn’t that you’re not working hard enough. The problem is that you’re letting your calendar manage you instead of the other way around.
Time blocking is a simple yet powerful calendar management method where you schedule specific tasks into dedicated time slots on your calendar. Instead of maintaining an endless to-do list and hoping to find time for important work, you proactively assign every task its own protected time window.
This guide will walk you through creating your first time-blocked schedule from scratch. By the end, you’ll have a clear, actionable weekly calendar that protects your most important work and gives you back control of your day.
What You’ll Need Before You Start (The Prerequisites)
Before diving into time blocking, gather these essential tools and information:
1. Choose Your Digital Calendar
You need a calendar tool that allows you to create, edit, and move blocks easily. The best options include:
- Google Calendar (free, integrates with everything, color-coding)
- Outlook Calendar (ideal if you’re in a corporate environment)
- Apple Calendar (seamless for Mac/iPhone users)
- Fantastical (premium option with natural language input)
For most beginners, Google Calendar is the perfect starting point—it’s free, intuitive, and accessible from any device.
2. Create Your Master Task List
Compile every task, project, and commitment currently on your plate. Include:
- Client projects and deliverables
- Meetings and appointments
- Administrative work (emails, invoicing, planning)
- Personal responsibilities you can’t ignore
- Recurring tasks (weekly reports, content creation, etc.)
Don’t worry about organizing this list yet—just get everything out of your head and into one document.
3. Awareness of Your Energy Patterns
Pay attention to when you feel most focused during the day. Are you sharpest in the morning? Do you hit your stride after lunch? Understanding your natural energy rhythms will help you place the right tasks at the right times.
4. Realistic Time Estimates
Most people dramatically underestimate how long tasks take. If you think something will take 30 minutes, assume it’ll take 45. Building in this buffer from the start prevents your entire schedule from collapsing when reality hits.
Step 1: Perform a Brutally Honest Time Audit
Before you can design an effective time-blocked schedule, you need to understand where your time currently goes. Most people are shocked by what they discover during this process.

How to Do It:
For the next 2-3 days, track everything you do in 30-minute increments. Use a simple notebook, spreadsheet, or time-tracking app like Toggl. Record:
- What you worked on
- How long it actually took
- Whether it was planned or reactive
- Your energy level during the task (high, medium, low)
What You’ll Discover:
This audit reveals your personal patterns:
- Time Leaks: Where do hours disappear? (Email? Social media? Meetings?)
- Productive Windows: When are you genuinely focused vs. just “busy”?
- Task Duration Reality: How long do things actually take vs. what you thought?
- Interruption Patterns: What breaks your flow most often?
Example Insight: Sarah, a freelance writer, discovered she spent 90 minutes daily on email—scattered across 12 different check-ins. By understanding this pattern, she knew exactly what to fix with time blocking.
This data becomes the foundation for building a realistic schedule. Skip this step, and you’ll create a fantasy calendar that collapses by Tuesday afternoon.
Step 2: Identify Your “Big Rock” Priorities for the Week
Now that you understand where your time goes, it’s time to decide where it should go. This is where the famous “Big Rocks” metaphor becomes critical.
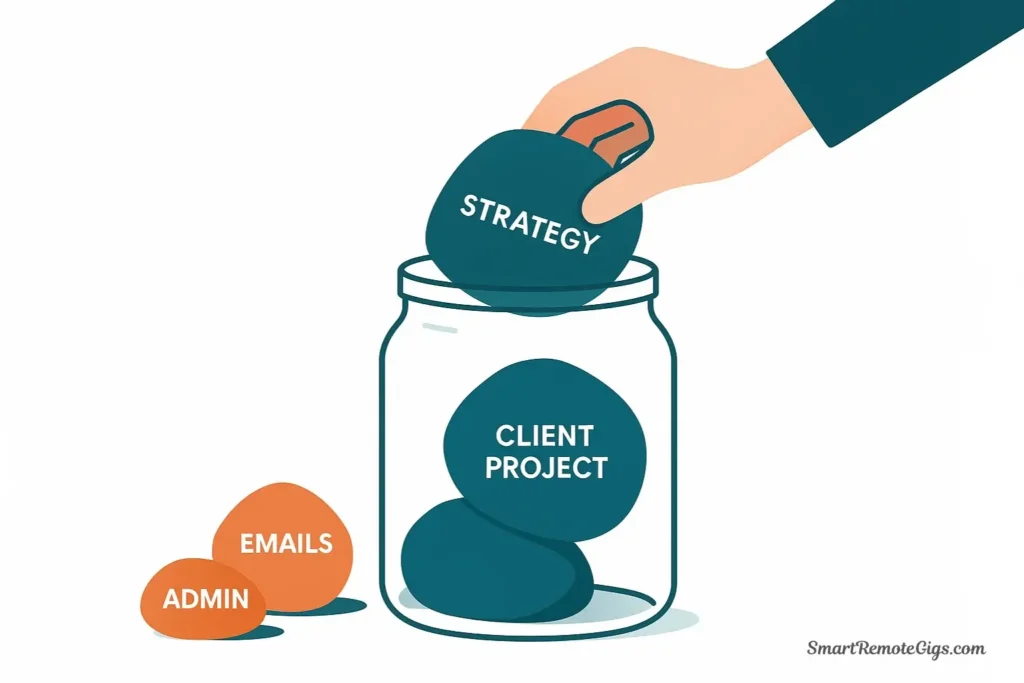
Imagine filling a jar. If you put sand (small tasks) in first, the big rocks (important projects) won’t fit. But if you place big rocks first, sand fills the gaps around them. Your calendar works the same way.
How to Identify Your Big Rocks:
Each week, ask yourself: “If I only accomplished three things this week, which three would make the biggest impact?”
These are typically:
- High-Value Client Work: The projects that generate income or build your portfolio
- Strategic Projects: Work that moves your business or career forward
- Non-Negotiable Commitments: Deadlines, presentations, critical meetings
Example Big Rocks for a Freelance Designer:
- Complete logo concepts for new client (Due Friday)
- Finish website redesign mockups (Due Thursday)
- Prepare portfolio presentation for prospect meeting (Wednesday)
Everything else—emails, invoicing, social media, admin work—is important but not urgent. These items are the “sand” that fills in around your big rocks.
Pro Tip: If you’re struggling to identify priorities, ask: “What would cause actual consequences if it didn’t get done this week?” That’s a Big Rock.
Step 3: Block Your “Big Rocks” in Your Calendar First
This is the most important step in the entire process. Open your calendar and schedule your Big Rocks before anything else touches your week.

The Blocking Process:
1. Find Your Peak Performance Windows
Based on your time audit, identify when you’re most focused. For most people, this is morning (9 AM – 12 PM). This is premium real estate—reserve it for your most demanding work.
2. Create Blocks for Each Big Rock
Schedule 2-4 hour blocks for deep, focused work. Give each block:
- A specific title: “Draft Logo Concepts – Smith Project” (not just “Design Work”)
- A distinct color: Use your calendar’s color-coding to differentiate project types
- Protected status: Mark as “Busy” so others can’t book over it
3. Schedule Multiple Sessions Per Project
Don’t try to complete a massive project in one block. Break it into logical sessions:
- Monday 9-11 AM: Research & mood board for Smith logo
- Tuesday 9-12 PM: Sketch initial concepts
- Wednesday 9-11 AM: Refine top 3 concepts
- Thursday 2-4 PM: Finalize presentation
4. Respect the Non-Negotiables
Place your blocks around existing commitments like client meetings or appointments. Don’t try to squeeze deep work into 45-minute gaps—you need minimum 90-minute blocks for meaningful progress.
Real Example – Monday Schedule:
- 9:00 – 11:30 AM: Big Rock Block – Draft Client Proposal (Deep Work)
- 11:30 – 12:00 PM: Buffer Time
- 12:00 – 1:00 PM: Lunch
- 1:00 – 2:00 PM: Client Call (Non-negotiable)
- 2:00 – 4:00 PM: Big Rock Block – Website Mockups (Deep Work)
Notice how the Big Rocks are scheduled first, and everything else works around them. This is the opposite of how most people schedule—and it’s why time blocking works.
If you’re wondering how this compares to other productivity methods, check out our analysis of time blocking vs task batching to understand when to use each approach.
Step 4: Batch Your “Shallow Work” into Admin Blocks
Now that your Big Rocks are protected, it’s time to schedule the necessary-but-less-critical tasks that keep your work life functioning.

What Qualifies as Shallow Work:
- Responding to emails
- Invoicing and bookkeeping
- Scheduling meetings
- Social media management
- File organization
- Quick client check-ins
This is where our hybrid system truly comes to life. Instead of just scheduling a vague “Admin” block, you’ll be using the principles of task batching within that time block. By grouping similar activities together, you eliminate context switching and process your shallow work with maximum efficiency. This is the perfect way to apply the concepts from our beginner’s guide to task batching within your time-blocked schedule.
How to Block Shallow Work:
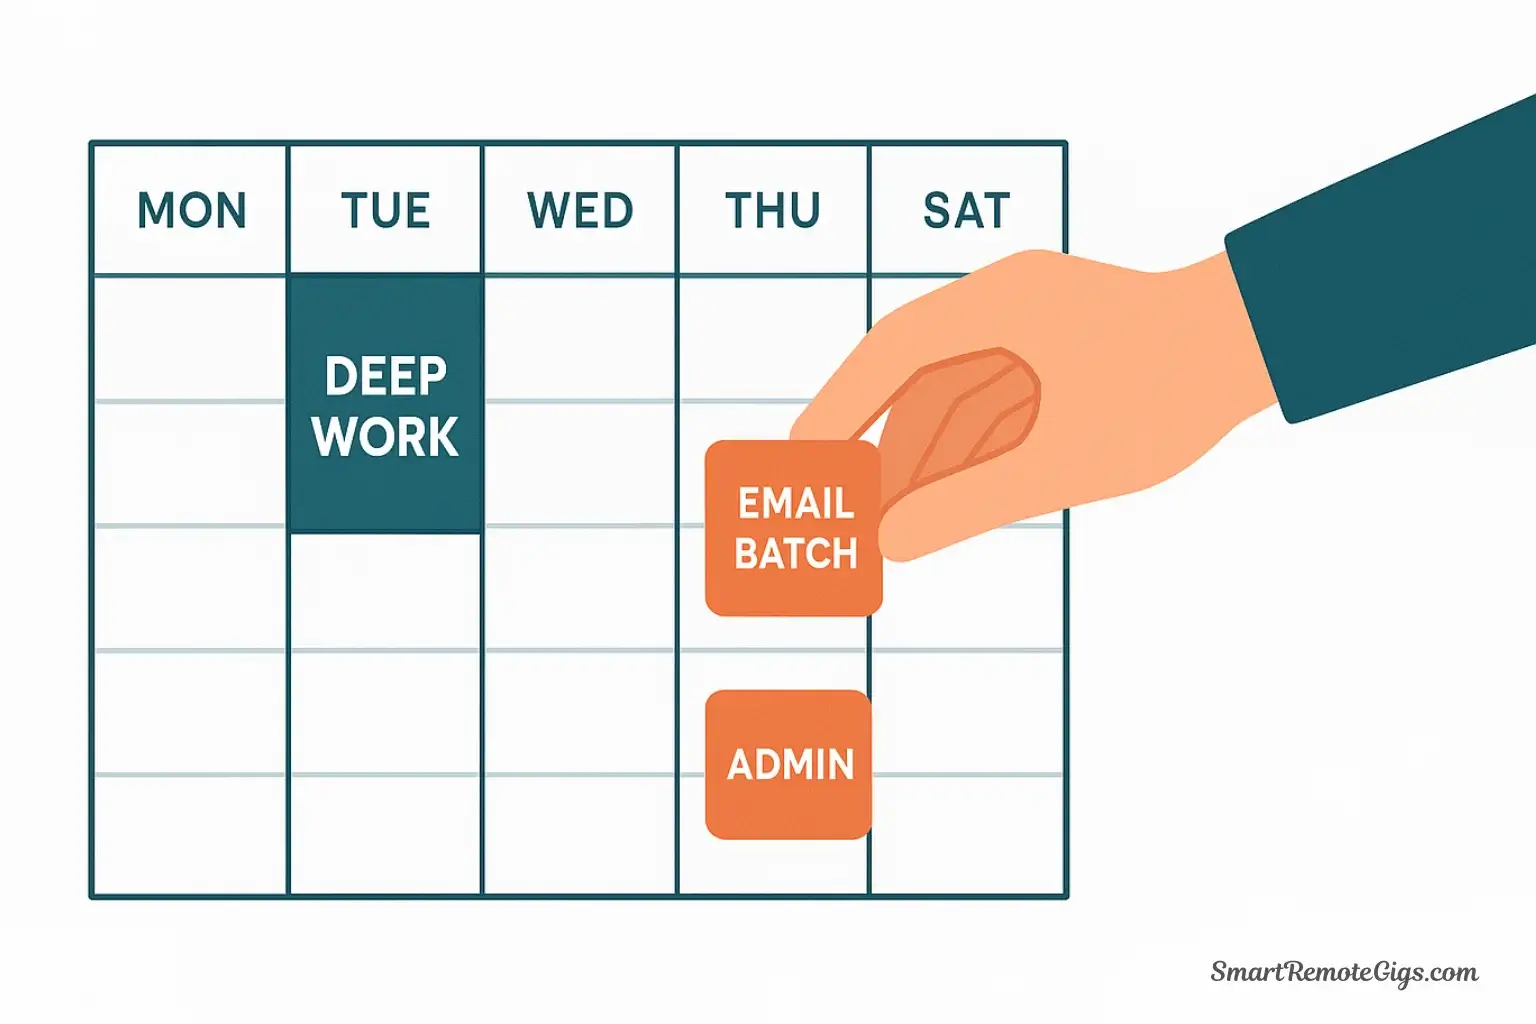
1. Create Themed Blocks
Instead of scattering admin tasks throughout the day, group similar activities:
- Communications Block (emails, messages, calls)
- Financial Block (invoicing, expenses, payment follow-ups)
- Planning Block (weekly review, next week’s prep)
2. Schedule Them During Lower-Energy Times
If your energy dips after lunch or late afternoon, that’s perfect for shallow work. Save your peak hours exclusively for Big Rocks.
3. Use Smaller Time Windows
Shallow work blocks typically need 30-90 minutes, not 3 hours. The shorter window actually improves focus—you work faster when you have a deadline.
Sample Shallow Work Schedule:
- 2:00 – 3:00 PM: Communications Block (Process all emails, respond to messages)
- 4:00 – 4:30 PM: Admin Block (Send invoices, update project tracker)
- 5:00 – 5:30 PM: Planning Block (Review today, prep tomorrow)
Important Principle: Shallow work expands to fill available time (Parkinson’s Law). If you give yourself 3 hours to process email, it’ll take 3 hours. Give yourself 45 minutes with a clear end time, and you’ll be amazed how efficiently you work.
Step 5: Add Buffer Time and Mandatory Breaks
The biggest mistake beginners make is creating a perfectly optimized schedule with zero margin for reality. Life happens. Clients call. Tasks take longer than expected. Your calendar needs breathing room.

Why Buffers Are Non-Negotiable:
Research shows that back-to-back scheduling leads to decision fatigue, reduced creativity, and eventual burnout. Your brain needs transition time between different types of work.
How to Build in Buffers:
1. Add 30-Minute Buffers Between Major Blocks
Schedule explicit “Buffer Time” or “Transition Time” between big blocks. Use these for:
- Wrapping up the previous task
- Taking a genuine break
- Handling unexpected urgent items
- Preparing mentally for the next block
2. Schedule Real Breaks
Put lunch and breaks directly in your calendar, or they won’t happen. Treat them as non-negotiable as any meeting:
- 12:00 – 1:00 PM: Lunch (away from desk)
- 3:00 – 3:15 PM: Walk/Stretch Break
3. Leave 20% of Your Week Unscheduled
Don’t block every single hour. Leave approximately one full day’s worth of time open for:
- Client emergencies
- Tasks that run over
- Unexpected opportunities
- Creative exploration
- Mental recovery
Buffer Block Examples:
- 11:30 AM – 12:00 PM: Buffer (wrap up morning work, prep for lunch)
- 1:30 – 2:00 PM: Buffer (transition from meeting to deep work)
- 4:30 – 5:00 PM: Buffer (handle any urgent items before end of day)
Reality Check: A schedule blocked at 100% capacity will fail by Tuesday. A schedule blocked at 80% capacity with strategic buffers will actually get followed—and you’ll be more productive as a result.
Many people struggle with time blocking because they don’t build in this flexibility. Learn more about why time blocking fails and how to avoid common pitfalls.
A Sample Time-Blocked Day (Visual Walkthrough)
Let’s see how all five steps come together into a real, functional schedule. Here’s what a productive Tuesday might look like for a freelance consultant:
Tuesday – Time-Blocked Schedule
Morning: Deep Work Zone
- 8:00 – 8:30 AM: Morning Routine (exercise, breakfast, planning)
- 8:30 – 9:00 AM: Review day’s schedule, prioritize
- 9:00 – 11:30 AM: 🎯 BIG ROCK – Draft Client Strategy Document (Deep Work)
- 11:30 – 12:00 PM: Buffer Time / Email triage
Midday: Break & Meetings
- 12:00 – 1:00 PM: Lunch Break (away from computer)
- 1:00 – 2:00 PM: Client Check-in Call (scheduled commitment)
- 2:00 – 2:30 PM: Buffer / Meeting notes
Afternoon: Secondary Work & Admin
- 2:30 – 4:00 PM: 🎯 BIG ROCK – Research for Upcoming Proposal (Focused Work)
- 4:00 – 4:15 PM: Break (walk, coffee)
- 4:15 – 5:00 PM: 📋 Admin Block (Process emails, send invoices, schedule meetings)
- 5:00 – 5:30 PM: 📋 Planning Block (Review today, prep tomorrow, weekly tracking)
End of Day
- 5:30 PM: Hard stop, close laptop
Key Elements That Make This Work:
- Two Big Rock blocks during peak energy (morning and early afternoon)
- Meetings and calls scheduled mid-day, not interrupting deep work
- Multiple buffers preventing back-to-back scheduling stress
- Shallow work grouped into efficient afternoon blocks
- Actual breaks scheduled as real appointments
- Hard stop time to prevent endless workdays
Color-Coding for Clarity:
- 🎯 Big Rocks / Deep Work: Blue
- 📋 Admin / Shallow Work: Yellow
- 🤝 Meetings / Calls: Green
- 🔄 Buffers / Breaks: Gray
This isn’t a fantasy schedule—it’s realistic, sustainable, and actually accomplishable. The key is that your most important work (Big Rocks) happens first, during protected time, before the day’s chaos can derail your plans.
Conclusion: Putting Your New Schedule into Action
You now have everything you need to create your first time-blocked schedule. But here’s the truth most productivity guides won’t tell you: Your first schedule will be wrong.
And that’s completely fine.
Time blocking isn’t about creating the perfect schedule on day one—it’s about building a system that evolves with your real work patterns. Expect to adjust your blocks, move things around, and discover that your time estimates were optimistic. This is the learning process.
Your Week 1 Action Plan:
- Tonight: Perform your time audit for the next 2-3 days
- This Weekend: Identify your Big Rocks for next week
- Sunday Evening: Open your calendar and block your Big Rocks first
- Monday: Follow your schedule, take notes on what works and what doesn’t
- Friday: Review the week and adjust next week’s blocks accordingly
Common First-Week Challenges:
You’ll be tempted to abandon your blocks when something “urgent” appears. Resist this urge. Ask yourself: “Is this actually urgent, or just someone else’s poor planning?” Protect your Big Rock time fiercely—it’s the only way the system works.
You might feel uncomfortable saying “I’m not available until 2 PM” when someone requests your time during a morning deep work block. This discomfort is normal. It’s also a sign you’re finally prioritizing your own work.
Remember: The goal isn’t to fill every hour with productivity. The goal is to ensure your most important work gets done, consistently, without relying on willpower or motivation. Time blocking removes the daily decision of “what should I work on now?” and replaces it with intentional design.
Ready to see how time blocking integrates with other productivity methods? Check out our comprehensive guide on time blocking vs task batching to build a complete productivity system that works for your unique situation.
Start with one week. Follow the five steps. Adjust as you learn. Before you know it, time blocking won’t feel like a system you’re forcing yourself to use—it’ll feel like the only way you can imagine working.
For more productivity strategies and time management techniques, explore our complete guide library designed specifically for freelancers and knowledge workers.
Learn a simple, 5-step system to build an effective time-blocked schedule from scratch. This method will help you protect your most important work, eliminate distractions, and take back control of your workday.
Total Time: 2 hours
Step 1: Perform a Brutally Honest Time Audit

Before creating your schedule, track where your time currently goes. For 2-3 days, record everything you do in 30-minute increments. Note the task, how long it actually took, and your energy level. This audit will reveal your time leaks, productive windows, and realistic task durations, forming the foundation for your new schedule.
Step 2: Identify Your “Big Rock” Priorities

Each week, determine your “Big Rocks”—the 3-5 most important tasks that will make the biggest impact. These are typically high-value client work or strategic projects. Everything else is “sand” that will fill in around these priorities. This step ensures your most critical work gets scheduled first.
Step 3: Block Your “Big Rocks” in Your Calendar First

Open your digital calendar and schedule your Big Rocks during your peak energy windows (usually mornings). Create 2-4 hour blocks with specific titles and distinct colors. Treat these blocks as non-negotiable appointments. Schedule them before adding any meetings or smaller tasks to your week.
Step 4: Batch Your “Shallow Work” into Admin Blocks
Now, schedule your “shallow work” (emails, invoicing, admin tasks) into smaller, themed blocks. Use the principles of task batching to group similar activities together. Place these 30-90 minute blocks during your lower-energy times, such as mid-afternoon, to process them efficiently without interrupting your deep work.
Step 5: Add Buffer Time and Mandatory Breaks

To make your schedule realistic and resilient, build in flexibility. Schedule 30-minute “Buffer Time” blocks between major deep work sessions to handle transitions or unexpected items. Add your lunch and short breaks to the calendar as real appointments. Aim to leave about 20% of your week unscheduled to accommodate reality.
Tools:
- A Digital Calendar (e.g., Google Calendar, Outlook Calendar)
- A Master Task List (Pen and paper, or a digital document)
- A time-tracking app for the audit phase (Optional, e.g., Toggl)